
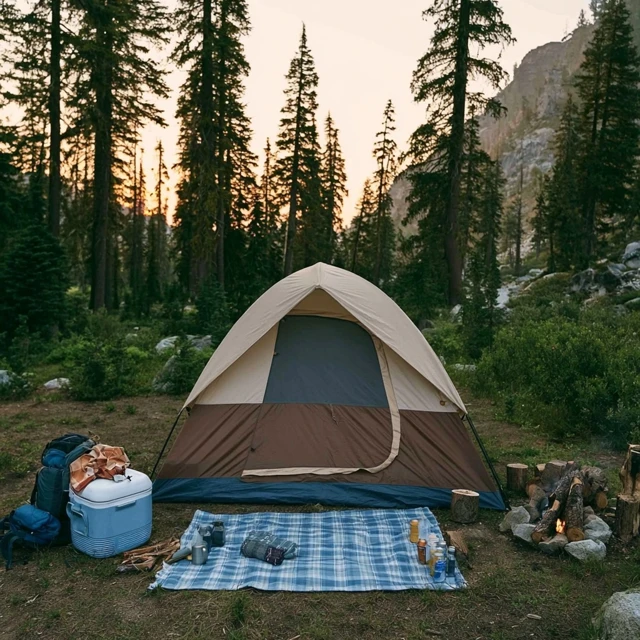
There’s something about the smell of a rainfly after a night of drizzle. The sound of droplets hitting nylon, the cool air slipping through the mesh, and the quiet satisfaction of knowing everything stayed dry. That feeling doesn’t happen by luck. It happens because you checked the right things before you left home.

A tent camping checklist printable is more than a piece of paper. It’s a safety net for your sleep, your gear, and your peace of mind. But not all checklists are created equal. The ones you find online often list the obvious — tent, sleeping bag, matches — and stop there. They miss the small details that separate a comfortable trip from a miserable one.
So let’s build something better. A checklist that actually works, with a few tricks you won’t see on every other site.
Shelter: More Than Just the Tent
The tent itself is just the start. You need a footprint that’s cut slightly smaller than the tent floor — if it sticks out, rain will pool under it and soak through. I use a piece of Tyvek or a cheap polycryo ground cloth. Cut it to size with scissors, and round the corners so it doesn’t snag.
Stakes matter more than most people think. The ones that come with budget tents bend easily in hard ground or pull out in loose sand. I pack 10 stakes for a 4-person tent: 8 for the corners and guylines, plus 2 spares. Use 6-inch aluminum or steel stakes for most soil. For sandy sites, bring 8-inch sand stakes with wide flanges.
Guylines are non-negotiable in wind. Most tents have reflective loops on the fly. Attach a 4-foot guyline to each loop, and stake them out at a 45-degree angle from the tent. This stops the fly from flapping and keeps rain from blowing under it. Practice this at home once. It takes two minutes and saves a lot of swearing at the campsite.
Common mistake to avoid: Don’t set up your tent directly under a dead tree or a branch that looks suspect. Look up before you pitch. A widowmaker can ruin your trip in an instant.
Sleep System: Comfort Is a Skill
A sleeping bag is only as good as the pad under it. The ground saps heat faster than air, so you need insulation beneath you. I use a closed-cell foam pad (R-value around 2) under an inflatable pad (R-value 4.5) for a total of 6.5. That handles temperatures down to freezing. If you’re camping in summer, a single inflatable pad with R-value 2-3 is plenty.
Inflate your pad fully before you leave home. Leave it overnight to stretch the fabric. Then deflate and pack it. This prevents the “my pad feels half-empty” surprise on the first night.
Pillows: a stuff sack filled with your puffy jacket works better than most cheap camping pillows. Put it inside a cotton t-shirt for comfort. If you bring a dedicated pillow, test it at home for loft and support.
Safety note: Never use a camp stove, heater, or lantern inside your tent. Carbon monoxide is odorless and deadly. Even a small propane lantern can produce dangerous levels in an unventilated space. Keep all combustion sources outside, at least 10 feet from the tent entrance.
Lighting: Layers of Illumination
One light source isn’t enough. I carry three: a headlamp for hands-free tasks, a small lantern for inside the tent, and a backup flashlight in my pack. Headlamps with red mode are worth the extra cost — red light preserves night vision and doesn’t attract bugs the way white light does.
Pack extra batteries in a waterproof container. A small dry bag or a ziplock with a desiccant packet works. Test your lights before you pack them. Dead batteries at midnight are a special kind of frustration.
Kitchen: Cook Smart, Not Hard
A camp stove with a windscreen (but not blocking the fuel canister’s airflow) makes cooking in breezy conditions possible. I use a canister stove with a piezo igniter. Bring a backup lighter in a waterproof match case. Matches are useless if they’re damp.
One pot, one spork, one bowl per person. That’s all you need. Skip the elaborate cook set. A single 1.5-liter pot handles boiling water for dinner and coffee. A collapsible silicone bowl saves space.
Food storage: Keep all food, trash, and scented items (toothpaste, deodorant) in a bear canister or a bear bag hung 12 feet off the ground and 10 feet from your tent trunk. In areas without bears, raccoons and mice will still raid your food. A rodent-proof container or a hard-sided cooler locked in your car is best.
Clothing and Weather Prep
Layers are your friend. A base layer of merino wool or synthetic (never cotton next to skin), a mid-layer of fleece or puffy, and a waterproof shell. Cotton kills — it stays wet, saps warmth, and takes forever to dry.
Bring a warm hat and gloves even in summer. Mountain nights can drop 30 degrees from daytime highs. A lightweight beanie and liner gloves take up almost no space.
Check the weather forecast 24 hours before you leave, and again at the trailhead. If thunderstorms are predicted, avoid setting up on exposed ridges or under lone trees. Pitch in a low area but not in a dry creek bed — flash floods are real.
Safety and Hygiene: The Non-Negotiables
First aid kit: build your own. Start with adhesive bandages in multiple sizes, sterile gauze pads, medical tape, antiseptic wipes, tweezers, blister treatment (moleskin or leukotape), ibuprofen, antihistamine, and a small roll of duct tape. Add any personal medications. Check expiration dates before each trip.
Sun protection: SPF 30+ sunscreen, a wide-brimmed hat, and UV-blocking sunglasses. The sun at altitude is brutal even on cloudy days.
Waste management: pack a trowel (Deuce of Spades or similar), toilet paper in a ziplock, and hand sanitizer. Dig a cathole 6-8 inches deep, at least 200 feet from water, trails, and camp. Pack out used toilet paper in a waste bag.
The Printable Checklist: What to Actually Write Down
Here’s the trick that sets this checklist apart: organize it by packing sequence, not by category. Write items in the order you’d pack them in your car or backpack. That way, you check things off as you load, and nothing gets buried under other gear.
For example:
- Tent body, rainfly, poles, stakes, footprint — packed together in one bag
- Sleeping bag, pad, pillow — packed together
- Stove, fuel, pot, lighter, matches — packed together
- Clothing layers in a dry bag
- First aid kit, toilet kit, sun protection — in an accessible pocket
- Food and water — last in, first out
Print your checklist on cardstock and laminate it, or slip it into a page protector. Use a dry-erase marker to check items. After the trip, wipe it clean and reuse it. Keep a digital copy on your phone as a backup.
Update the list after every trip. Cross off things you didn’t use. Add things you wished you had. Over time, it becomes a custom tool that fits your exact style of camping.
One More Thing
Don’t overpack. A checklist helps you avoid forgetting essentials, but it can also encourage you to bring too much. Be honest about what you actually use. If you haven’t used the camp chair in three trips, leave it home. Your back and your car space will thank you.
Takeaway: A tent camping checklist printable is only as good as the thought behind it. Build yours with care, test it in real conditions, and refine it over time. That quiet, dry night in your tent — the one where everything just works — starts with a piece of paper and a pen.
Frequently Asked Questions
What should be on a tent camping checklist?
A solid tent camping checklist should cover shelter (tent, stakes, guylines, footprint, repair kit), sleep system (sleeping bag, pad, pillow), lighting (headlamp, lantern, extra batteries), cooking (stove, fuel, pot, utensils, matches in waterproof container), clothing layers, first aid kit, sun protection, insect repellent, and food/water. Don’t forget a trowel and toilet paper for waste.
How do I make a printable camping checklist?
Use a simple table or bulleted list in a word processor or spreadsheet. Group items by category (shelter, sleep, kitchen, clothing, safety). Leave checkboxes next to each item. Print on sturdy paper or laminate it for reuse. Keep a digital copy on your phone as backup.
What is the most commonly forgotten camping item?
The tent footprint or ground tarp is surprisingly common. Also, matches or a lighter that are actually dry, and a repair kit for the tent. Many people forget a pillow or a sleeping pad, which ruins sleep quality.
Can I use a camping checklist for backpacking?
Yes, but you’ll need to trim it down. Focus on ultralight shelter, sleep system, and cooking gear. Omit bulky items like a large lantern or camp chairs. Use a backpacking-specific checklist that prioritizes weight and packability.
How do I keep my tent camping checklist organized?
Keep the checklist in a ziplock bag or laminated card in your gear bin. Use a marker to check items off. After the trip, note what you didn’t use and what you missed. Adjust the list for next time. This builds a personalized, reliable system.