
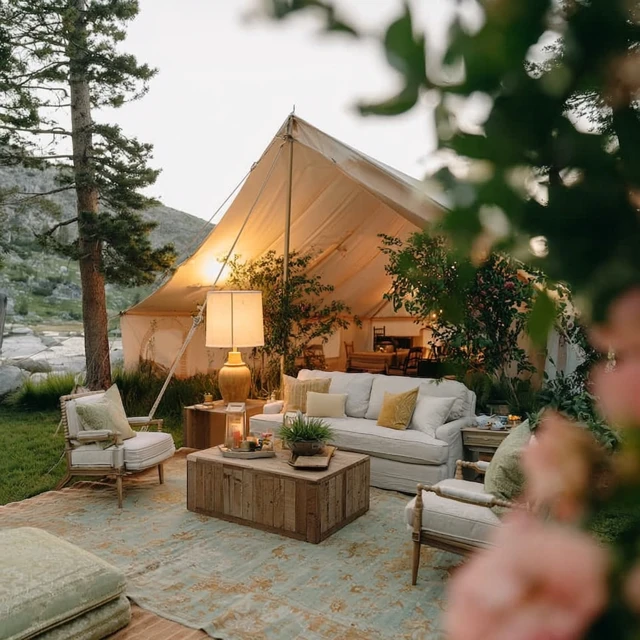
The first time I sat in a tent that felt like a room — not just a place to sleep — I understood the difference. It wasn’t about luxury. It was about having a space where you could stretch out, read a map, eat a meal without crouching on a sleeping bag. A tent living room changes how you spend your evenings under canvas. Here’s how to build one that works in real weather, with real gear.

Start With the Floor: The Foundation of a Tent Living Room
Before you arrange a single chair, lay down a groundsheet. I use a heavy-duty tarp cut to fit the tent footprint, folded under at the edges so water doesn’t pool. On top of that goes a camp rug — something with a rubberized backing. A 5×7 foot rug covers enough area for two chairs and a small table without overwhelming the tent. The rug stops dirt from spreading, muffles the sound of rain, and gives your feet a break from cold nylon. Avoid foam mats here; they trap moisture underneath.
Choose Furniture That Fits the Space
Standard camp chairs work, but test the height. A chair that’s too tall will rub against the tent ceiling, causing condensation to drip on you. Look for low-profile camp chairs with a seat height around 12 to 15 inches. Pair them with a folding table no wider than 24 inches. I prefer a table with a mesh shelf underneath for storing cups, a headlamp, or a deck of cards. Keep the table low — about 18 inches tall — so it doesn’t block the view across the tent.
The One Trick That Changes Everything: The Stake-and-Shelf System
Here’s the specific angle you won’t find on ten other sites. Instead of piling gear on the floor, I use a lightweight folding shelf — the kind sold as a camping kitchen organizer, about 24 inches wide and 30 inches tall. I stake the legs to the tent floor using small ground stakes or sand pegs driven through the shelf’s leg loops. This keeps the shelf stable even when you bump it in the dark. Place it against the back wall of the tent living room. It holds a stove (stored safely, never used inside), a water bottle, snacks, and a lantern. No more digging through a duffel for your coffee cup. The stake-and-shelf system also prevents the shelf from tipping over when you pack it with heavier items. For windy conditions, add a loop of paracord from the shelf top to a tent pole clip — just enough tension to stop wobble.
Lighting: Set the Mood Without the Risk
Battery-powered lanterns with a dimmer setting are essential. I hang one from the tent ceiling using a small carabiner on a loop of shock cord. Place it off-center — directly overhead creates harsh shadows. A second lantern on the folding table at low light gives you a warm glow for card games or reading. String lights with USB batteries work well along the tent ridge line, but keep them away from nylon walls. The common mistake is using too much light. A tent living room should feel cozy, not like an interrogation. One dim lantern and a string of fairy lights is plenty.
Storage That Keeps the Floor Clear
Clutter kills the living room vibe. Use a gear loft or a mesh organizer that hangs from the tent ceiling. Store small items like glasses, a phone, and a notebook there. For bulkier items, use collapsible fabric bins — the cube style that folds flat. Place one bin next to each chair for personal items. Keep a small trash bag clipped to the table leg with a binder clip. In rain, everything damp goes into a dry bag, not on the rug. This keeps the space livable even after a downpour.
Adapting for Weather and Terrain
On hot nights, position the tent living room near the door with the fly partially open for airflow. Use a battery-powered fan clipped to the gear loft. For cold weather, lay an extra closed-cell foam pad under the rug for insulation. In wind, stake everything — the rug corners, the shelf legs, the chairs if they’re light. I’ve seen a chair tumble across a tent and knock over a lantern. Secure it. For campsites with uneven ground, use a trowel to level a small area for the rug before pitching the tent. A few minutes of prep saves you from sitting at an angle all evening.
Safety Notes for a Tent Living Room
Never cook or use a fuel-burning heater inside the tent. Carbon monoxide is odorless and deadly. Keep all flames outside. Store food in a sealed cooler or bear canister away from the tent, even if you’re in low-risk areas. Check local wildlife regulations. Secure your tent well in wind — use extra stakes on the living room side if it’s catching gusts. A well-set tent living room is a joy, but only if it’s safe.
A Quick Takeaway
A tent living room isn’t about bringing the house to the woods. It’s about creating a functional, comfortable spot to relax after a day outside. Start with a rug, two chairs, a low table, and the stake-and-shelf system. Light it dimly. Keep the floor clear. Adapt for weather. That’s it. You’ll spend more time sitting in your tent — and less time crawling over your gear.
Frequently Asked Questions
How do I arrange furniture in a tent living room?
Start by laying a waterproof groundsheet, then a rug. Place chairs along one side facing a low table for a conversation area. Leave a clear path to the sleeping area. Stake a lightweight shelf or gear loft on the opposite wall for storage.
What are the best items for a tent living room?
A camp rug (about 5×7 feet), two compact camp chairs, a small folding table (around 24 inches wide), a lantern with a dim setting, and a collapsible storage bin for odds and ends. A gear loft or hanging organizer keeps clutter off the floor.
How do I keep the tent living room dry in rain?
Set up a tarp over the tent entrance as a vestibule. Keep a small mat just inside to wipe shoes. Elevate gear off the floor using a folding shelf or dry bag. Ensure your tent fly is properly tensioned to prevent condensation drips.
Can I use a camp stove inside the tent living room?
Never use a camp stove, heater, or any open flame inside a tent due to carbon monoxide poisoning and fire risk. Cook outside under a tarp or in a vestibule with proper ventilation. Use only battery-powered lanterns for light.