
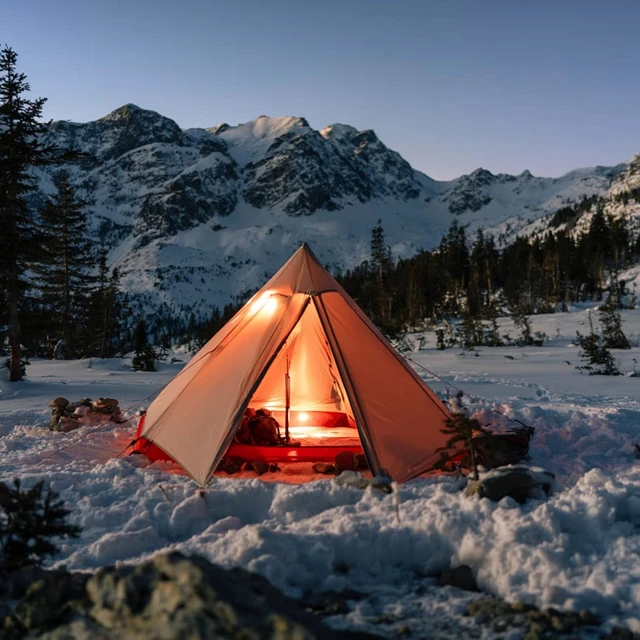
The first morning of tent living full time winter teaches you one thing fast: moisture is the real enemy, not the cold. I woke to a layer of frost on the inside of my fly, a damp sleeping bag hood, and the quiet drip of meltwater near my pillow. That day I changed everything about how I set up, and I have not repeated that mistake since.

Winter tent living demands a different mindset than summer camping. You are not just sleeping outside—you are creating a microclimate that keeps you dry, warm, and safe through weeks of snow, wind, and subzero nights. Here is what I have learned from many cold nights under nylon.
Choose the Right Tent for Full-Time Winter Use
You need a four-season tent. Not a three-season with a rainfly. The poles must be thicker—DAC aluminum or similar—and the fabric should be ripstop nylon with a hydrostatic head of at least 3000mm. Look for a design that sheds wind: a geodesic or dome shape with multiple crossing poles. The vestibule is not optional. It stores your gear, cooks your food, and keeps snow out of the sleeping area.
Common mistake: buying a tent with mesh walls everywhere. Mesh is fine for ventilation, but too much lets snow drift in and cold air circulate at ground level. A winter tent should have solid fabric panels on the lower half of the inner tent, with mesh only near the top for breathability.
Site Selection and Snow Preparation
Where you pitch matters more in winter than any other season. Look for natural windbreaks: a grove of evergreens, the lee side of a hill, or a dense thicket. Avoid the base of slopes where cold air pools at night. I once set up in a small valley and woke to a temperature ten degrees colder than the forecast.
Before pitching, pack the snow down by skiing or stomping it flat. Let it sit for an hour to firm up. Then dig a shallow rectangular depression the size of your tent floor—about four inches deep. This gives you a flat, stable platform and a slight windbreak around the edges. Use the removed snow to build a small wall on the windward side.
Staking and Guyline Technique for Snow
Standard tent stakes will not hold in snow. You need snow stakes—long, wide, and serrated—or you can make deadman anchors. A deadman is any object buried in the snow that the guyline loops around. Skis, trekking poles, stuff sacks filled with snow, even a stout stick. Bury it at least a foot deep perpendicular to the pull direction.
Here is the specific sequence I use: stake the four corners first with deadmen. Then stake the vestibule. Then attach all guylines to the fly—every single loop. In wind, a loose fly flaps and pumps cold air inside. Cinch the fly tight so it does not touch the inner tent. That air gap is your insulation layer.
Safety note: In heavy snow, brush the tent roof off every few hours. A foot of wet snow can collapse a tent. I set an alarm on my watch for every three hours during a storm.
Condensation Control Is Your Daily Chore
This is the skill that separates comfortable winter tent living from miserable dampness. Your breath and body release about a pint of moisture per night. It rises, hits the cold fly, and condenses. Then it freezes. Then it melts onto your gear when the sun hits the tent.
Open the top vent fully every night, even when it is snowing. If your tent has no vent, leave the door unzipped an inch at the top and bottom to create crossflow. In the morning, before the sun hits the tent, take a small microfiber cloth and wipe the inside of the fly. Collect the frost and shake it outside. This one habit keeps your sleeping bag dry for weeks.
Specific trick: Hang a small thermometer inside the tent at head height. If the temperature inside is more than 15 degrees warmer than outside, you need more ventilation. That delta drives condensation.
Safe Heating Inside a Winter Tent
I use a certified propane radiant heater with an automatic shutoff if tipped over. It sits on a non-flammable surface—a metal baking sheet—at least three feet from any wall. A carbon monoxide detector hangs at sleeping level, and I test it every night before bed. Never use a stove or heater designed for outdoor use only inside a tent. That includes most camping stoves and all charcoal devices.
Ventilation is not optional with any heater. I crack the top vent and leave one small gap at the door. The flame consumes oxygen, and you need fresh air exchange. If you feel drowsy or get a headache, turn the heater off immediately and go outside.
For overnight heat, I rely on my sleep system, not the heater. The heater warms the tent for an hour before bed and again for an hour in the morning. Running it all night is wasteful and risky.
Sleep System Layering for Subzero Nights
Do not put your sleeping bag directly on the tent floor. The ground sucks heat out of you through conduction. Start with a closed-cell foam pad—the thickest you can find. On top of that, put an insulated air pad with an R-value of at least 5.0. Some people add a third layer: a thin foam pad or a blanket. The goal is to stop cold from reaching you from below.
Your sleeping bag should be rated at least 10 degrees colder than the lowest expected temperature. A -20°F bag for a 0°F night is not overkill. Add a fleece liner for another 10 degrees of warmth and easier washing. Wear a balaclava and dry wool socks to bed. Never sleep in the clothes you wore during the day—they carry moisture.
Before getting in the bag, do ten jumping jacks or squats. Warm muscles help the bag work faster. Then zip up completely, leaving only a small breathing hole.
Daily Moisture Management Routine
Every morning, air out your sleeping bag. Turn it inside out and drape it over a line in the vestibule or on a nearby branch if it is not snowing. Shake the frost off the tent walls. Wipe down the floor with a dry cloth. Then open all vents and the door for 15 minutes while you make breakfast. This exchange of dry outside air resets the humidity inside.
Cook outside or in the vestibule, not in the sleeping area. Steam from boiling water adds huge amounts of moisture. If you must cook inside, use a stove with a windscreen and keep the pot covered. Vent the steam out immediately.
Change your base layers every two days. Damp fabric against skin chills you fast. I wash socks and underwear in a zip-close bag with a drop of camp soap, then hang them to freeze-dry—they come out stiff but clean and dry after a few hours.
Takeaway: Winter tent living is a system of small, repeatable habits. Manage moisture, ventilate aggressively, layer your sleep system, and heat only when necessary. Do these things consistently, and a tent becomes a genuinely comfortable home through the coldest months. The frost on the walls will still form, but you will know exactly how to handle it.
Frequently Asked Questions
Can I really live in a tent through winter?
Yes, with proper gear and preparation. Focus on a four-season tent, safe heating, moisture management, and layering your sleep system. Ventilation is key to avoid condensation and carbon monoxide buildup if using a heater.
How do I keep warm in a tent all winter?
Layer your sleep system: a closed-cell foam pad under an insulated air pad, a winter-rated sleeping bag, and a bag liner. Use a certified tent stove or propane heater with a carbon monoxide detector, and always crack a vent.
What’s the biggest mistake in winter tent living?
Ignoring condensation. Your breath and body moisture freeze on the tent walls, then melt and soak everything. You must ventilate the top vent and wipe down walls each morning.
How do I prevent snow from getting inside?
Pitch the tent on packed snow, dig a shallow trench for the floor if possible, and keep the vestibule zipped. Brush snow off boots and gear before entering. Use a ground cloth that extends just under the tent, not beyond.