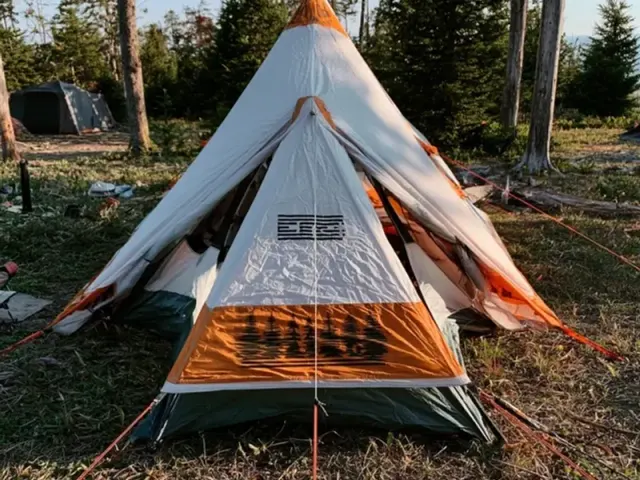
Tent Camping Setup: The 7-Step Sequence That Saves Time
The first thing I notice when I pull up to a campsite is the ground. Not the view, not the fire ring, but the dirt. Because that dirt—its slope, its texture, its drainage—will decide whether my tent stays dry and comfortable or turns into a saggy, leaky mess by midnight. After years of setting up tents in rain, wind, and the occasional unexpected hailstorm, I've settled on a sequence that works every time. Let me walk you through it.

1. Site Selection: The Five-Second Test
Before you unroll anything, walk the site. Look for a spot that's naturally level, but not in a low dip where water will pool. Run your hand over the ground—if you feel rocks, roots, or sharp sticks, clear them or move. I do a quick test: I lie down on the bare ground where my head and feet will go. If I feel a slope more than a gentle tilt, I shift the tent orientation or find another spot. For safety, check for dead branches overhead (widowmakers) and avoid ant hills or animal burrows.
Adapting for Rain
If rain is in the forecast, pick a spot on a slight rise, not at the bottom of a hill. Even a two-inch crown in the middle of your tent floor will keep water from seeping under the edges. And never pitch directly under a single tall tree in a thunderstorm—lightning seeks the highest point.
2. Lay the Footprint, Then the Tent Body
Spread your footprint (or a ground cloth cut to fit) exactly where the tent will go. Fold any excess under—a footprint that sticks out catches rain and channels it under the tent. Now lay the tent body on top, door where you want it, and smooth out the floor. Do not insert poles yet. Instead, stake the four corners of the tent body first. This is the trick that changed everything for me. Staking before poles keeps the fabric flat and prevents it from shifting when you raise the arch. Use a 45-degree angle away from the tent and push the stake all the way in until the loop is snug against the notch.
3. Raise the Poles in a Cross Pattern
Now assemble the poles. If you have a dome tent, insert the two longest poles first, crossing them at the center. Work slowly—if a pole snags, back up and try again; forcing it can tear the sleeve. Once both poles are through, insert the ends into the grommets at the corners. Raise the tent by lifting the center of the cross and pulling outward on the ends. The tent should pop up with a satisfying thwump. If it doesn't, check that all pole ends are seated correctly. For tunnel tents, raise the front arch first, then the rear, then the middle.
4. Stake the Remaining Points and Adjust
With the tent standing, stake any remaining loops on the body—usually at the door and vestibule areas. But don't just drive them in randomly. Walk around the tent and pull each stake outward until the fabric is drum-tight, no wrinkles. A tight floor means water runs off, not pools. A loose floor means you'll wake up in a puddle. For windy conditions, add extra stakes at the midpoint of each long side.
5. The Rain Fly: Timing and Tension
This is where most people go wrong. They throw the rain fly on loosely and call it done. Instead, attach the fly at the front and back first, then pull it tight over the tent body and clip or tie the sides. The fly should not touch the inner tent anywhere—if it does, condensation will drip onto your sleeping bag. Adjust the tension so the fly is taut but not straining. A loose fly flops in the wind and lets rain blow under. A too-tight fly can tear the grommets. Listen for the sound of a taught fly: a low hum in the breeze, not a frantic slap.
Guy Lines: Your Secret Weapon
Most tents come with reflective guy lines. Use them. Stake out each line at a 45-degree angle away from the tent, pulling until the line is straight but not guitar-string tight. This creates air gaps that improve ventilation and keep the fly from sagging onto the mesh. In heavy rain, guy lines are the difference between a dry interior and a wet one.
6. Final Walkaround and Adjustments
Before you move gear inside, walk around the tent. Check every stake. Is it fully in? Is the loop seated? Look at the fly—are there any low spots where water could collect? If so, adjust the pole or a guy line to raise that spot. Open the door and check the floor—any wrinkles? If yes, loosen the corner stakes, pull the fabric smooth, and re-stake. This is also the moment to check that zippers close smoothly and that the mesh is free of tears.
7. Inside Setup: Keep It Organized
Once the structure is solid, lay out your sleeping pad and bag. I keep a small mat just inside the door for removing shoes. Store everything in dry bags or stuff sacks, and keep gear off the tent walls to prevent condensation. For cooking, remember: never use a camp stove or lantern inside the tent. Carbon monoxide is odorless and deadly. Cook outside, at least 10 feet from the tent door.
One More Trick for Uneven Ground
If you can't find a perfectly level spot, use your sleeping pad to compensate. Place the thick end under your hips and the thinner end under your head. Or, dig a shallow trench on the high side of your sleeping area to lower it. But only if the site allows—check local regulations about altering ground. Some parks prohibit digging.
Takeaway
Setting up a tent isn't complicated, but skipping steps costs you comfort and safety. Stake the corners first. Tension the fly. Use those guy lines. And always, always check the forecast before you leave. A ten-minute setup done right beats a five-minute setup that leaks at 2 a.m. Happy camping.
Frequently Asked Questions
Should I stake the tent first or insert the poles first?
Always stake the four corners of the tent body first before inserting poles. This holds the tent in place and prevents the fabric from shifting as you raise the poles. It also keeps the floor flat and taut, reducing the chance of wrinkles that can pool water.
How do I set up a tent on a slope without sliding?
Orient the tent so your head is uphill when you sleep. Stake the uphill corners first, then the downhill corners, pulling the fabric taut. Use longer or angled stakes on the downhill side for extra grip. If the slope is more than 10 degrees, choose a different site.
What is the correct order for staking a tent in windy conditions?
Stake the windward corners first (the side the wind is coming from). Then stake the leeward corners. After that, add all guy-out points on the windward side before the leeward side. This keeps the tent from flapping and reduces stress on the poles.