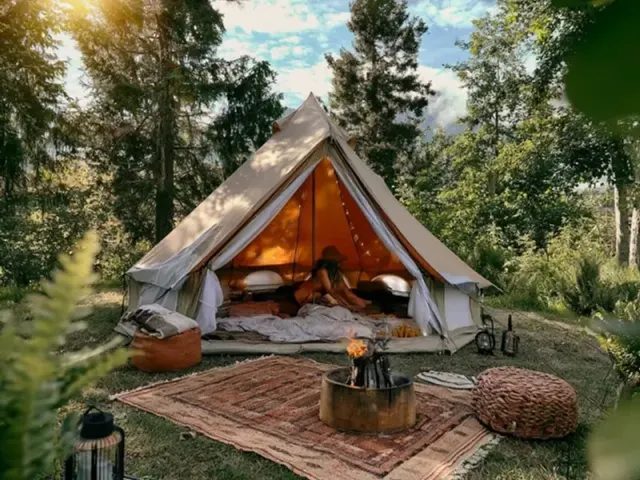
Tent Camping Setup Ideas for Indoor Practice
The first time I pitched a tent indoors, I was just trying to beat a rainstorm. But what I discovered was a whole new way to prepare for camping—one that saves time, frustration, and gear failure on the trail. Setting up a tent inside isn't just about practice; it's about dialing in your technique, checking every seam and zipper, and making sure you know exactly how that shelter works before you need it in the dark.

Why Practice Indoors?
Pitching a tent in your living room or garage lets you focus on the mechanics without the pressure of weather, bugs, or fading light. You can see how the poles curve, where the clips snap, and how the rainfly aligns. I always use this time to check for missing stakes, broken pole sections, or fabric tears—things you might miss in a hurry at the campsite.
One specific trick: lay a tarp or old blanket under the tent to protect your floor, especially if it's carpet or hardwood. Then, use rubber-tipped stakes or heavy books to simulate ground anchoring. This prevents scratches and lets you practice tensioning the tent body properly.
Step-by-Step Indoor Setup
1. Choose Your Space
Make sure you have enough room. A 4-person tent needs about 8x10 feet of clear floor space. Clear furniture, rugs, and pets out of the way. If your ceiling is low, stick to smaller tents or practice in a garage or basement with more headroom.
2. Lay Out the Pieces
Unroll the tent body, rainfly, pole bag, and stake bag. Lay each piece flat and check for damage. I once found a split pole sleeve this way—much better to fix it at home than at a rainy campsite.
3. Assemble the Poles
Slide pole sections together gently. Never force them—if they don't connect easily, check for dirt or damage. For color-coded poles, match the colors to the corresponding sleeves or clips. This step alone can save 10 minutes of frustration later.
4. Thread Poles Through Sleeves
If your tent uses sleeves, feed the pole through slowly, pushing rather than pulling to avoid snagging. For clip-style tents, attach the poles to the tent body first, then snap the clips over the poles. I prefer clip tents for indoor practice because they're faster to set up and adjust.
5. Raise the Tent
Lift the poles simultaneously to raise the tent. Walk around to ensure the fabric is evenly spread and not twisted. Insert the pole ends into the corner grommets or pins. This is where you check symmetry—a lopsided tent will catch wind and sag.
6. Stake the Corners
Use rubber-tipped stakes or heavy books to anchor the tent corners. Pull the tent body taut before staking each corner. I always stake in a cross pattern: first two opposite corners, then the other two. This creates even tension and prevents sagging.
7. Attach the Rainfly
Drape the rainfly over the tent, aligning the pole clips or Velcro tabs. Make sure the fly is centered and not touching the inner tent—that gap is crucial for condensation management. Secure the fly's corners with more stakes or weights.
Ventilation and Safety Indoors
Even indoors, ventilation matters. Open all tent windows and doors. If possible, set up near an open window or use a fan to keep air moving. Never—and I mean never—use camping stoves, lanterns, or heaters inside the tent, even for practice. Carbon monoxide is odorless and deadly. Stick to battery-powered lights only.
Also, be aware of fire hazards. Keep the tent away from space heaters, fireplaces, and candles. If you're practicing in a garage, make sure the space is well-ventilated and free of flammable fumes.
What to Check During Indoor Setup
- Zippers: Run them all the way up and down. Look for snags or misaligned teeth. A stuck zipper at midnight is no fun.
- Seams: Check for loose stitching or gaps. If you find any, seam seal them before your trip.
- Pole condition: Inspect each section for cracks, bends, or corrosion. A broken pole can collapse your tent in wind.
- Stakes: Count them. Make sure you have at least the number specified in the manual. I always carry two extra.
- Rainfly fit: The fly should cover the tent completely and have a small gap at the bottom for airflow. If it's too tight, it can tear in wind.
Adapting for Weather Conditions
Use indoor practice to simulate different conditions. For windy setups, practice staking the windward side first and using a taut-line hitch for adjustable tension. For rain, test how quickly you can attach the rainfly and whether the bathtub floor sits high enough to prevent water entry. For cold weather, practice adding a groundsheet and insulating pad inside the tent.
If you camp with kids, involve them in the indoor setup. Let them help clip poles or place stakes. It builds familiarity and reduces anxiety on the actual trip. Plus, they'll feel ownership of the tent.
A Final Tip: Time Yourself
Once you've set up and taken down the tent a few times indoors, time yourself. Aim for under 10 minutes for a 4-person tent. That's a realistic goal for a seasoned camper. If you're slower, practice the sequence until it becomes muscle memory. On a cold, rainy evening, that speed will be a lifesaver.
Takeaway: Indoor tent setup isn't just a rainy-day activity—it's a strategic rehearsal. You'll catch gear issues, perfect your technique, and arrive at your campsite confident and prepared. So clear some floor space, grab your tent, and get to work. Your future self will thank you.
Frequently Asked Questions
Can I set up a tent indoors without damaging the floor?
Yes. Lay a tarp or old blanket underneath the tent to protect carpets or hardwood. Use rubber-tipped stakes or heavy books instead of metal stakes to avoid scratches.
How do I ventilate a tent when practicing indoors?
Open all tent windows and doors. If possible, set up near an open window or use a fan to circulate air. Never use camping stoves, lanterns, or heaters inside the tent—even for practice.
Is indoor tent setup good for testing gear?
Absolutely. It's the perfect way to check that all poles, clips, and stakes are present and functional. You can also test zippers, seams, and rainfly fit without fighting wind or rain.