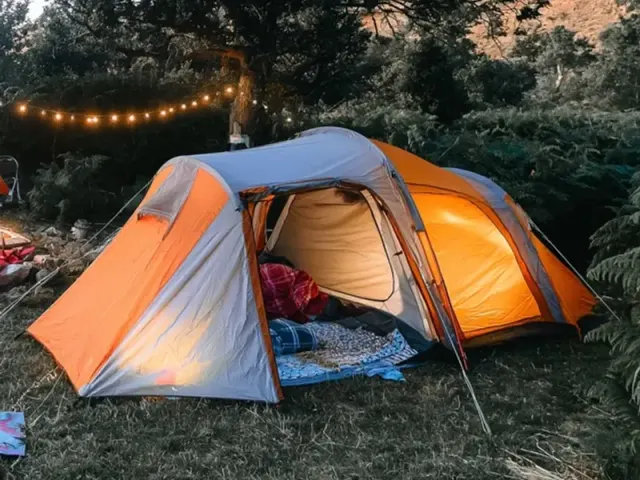
Tent Camping Setup Ideas for a Stable, Cozy Campsite
The first time I pitched a tent on a windy ridge, I learned what a poorly staked fly sounds like at 2 a.m. A constant, frantic snap-snap-snap against the poles. It wasn't just noise — the fabric was abrading, and by morning a small tear had appeared. That night taught me that a campsite setup isn't about throwing up a shelter as fast as possible. It's about reading the ground, the weather, and the light, then making deliberate choices before you even unroll the tent.

Here are the specific techniques I use every trip to turn a patch of dirt into a stable, comfortable home for the night. These aren't generic tips — they're the exact methods that keep my tent dry, my sleep warm, and my sanity intact when the weather turns.
Walk Before You Unpack: The Five-Minute Site Survey
Resist the urge to drop your pack and start pitching. Walk the entire campsite first. You're looking for three things: level ground, natural windbreaks, and hazards.
Level ground doesn't mean perfectly flat — a slight slope is fine, but you want your head uphill. I use a small round level (the kind you'd put on a shelf) or just roll a water bottle across the ground. If it stops, you're good. If it rolls, find a different spot or rotate your tent 90 degrees so the slope runs side-to-side, not head-to-toe.
Natural windbreaks are your best friend. A cluster of bushes, a fallen log, or a large rock can cut wind speed dramatically. Position your tent so the narrow end faces the prevailing wind — never the broad side. I check the treetops to see which way they're leaning, then orient accordingly.
Hazards are subtle. Look for small rocks, pine cones, or roots that will poke through your tent floor. Sweep them aside with your boot. Also check overhead — a dead branch (a "widowmaker") can fall in a storm. And avoid low-hanging branches that will scrape your rain fly all night.
Ground Prep: The Tarp Trick That Saves Your Floor
A ground tarp (or footprint) is essential, but size matters more than you think. The tarp must be slightly smaller than your tent floor — not larger. If it sticks out even an inch, rain will run down the side of the tent, hit the tarp, and pool underneath. That's how you wake up with a wet sleeping bag.
I cut my tarp 2 inches smaller than the tent footprint on all sides. If you're using a generic tarp, fold the edges under. For extra protection in sandy or muddy soil, I lay down a second, smaller tarp inside the tent for the sleeping area only. This gives a dry buffer if the main floor gets damp from condensation.
Pitching Sequence: Corners First, Then Tension
Here's the order that works every time, even in wind:
- Lay out the tent body on the tarp, oriented correctly.
- Insert the poles and clip or sleeve the tent body — but don't stake yet.
- Lift the tent and spread it so it's roughly in position.
- Stake the four corner loops first, pulling each one taut. I use a 45-degree angle away from the tent, with the stake hook facing up for easier removal.
- Now stake the side loops and door loops.
- Drape the rain fly over and attach it at the corners and pole clips.
- Stake the fly's guylines last. This is where most people rush. Pull each guyline tight, but not so tight that it bends the pole. Use a taut-line hitch so you can adjust tension later if the fabric stretches or the wind shifts.
The common mistake is staking the rain fly before the tent body is fully tensioned. The fly should be snug but not drum-tight — if you can't push the fabric down an inch with your finger, it's too tight. Loosen it slightly to allow for fabric expansion in rain.
Wind Strategy: Guylines and Angles
Most dome tents come with four guylines on the fly. Use all of them. In exposed sites, I add two more: one on each side of the windward wall, using a separate stake. This creates a low-angle line that resists lift.
For the guylines, I replace the factory cord with reflective 2.5mm paracord — it's stronger and easier to see at night. The knot I use is a taut-line hitch, which lets me adjust tension without retying. To set it, wrap the cord around the stake, then tie the hitch on the standing end. Pull the free end to tighten, and the knot holds. It's simple and reliable.
If the ground is too hard for stakes (rocky soil or compacted dirt), use deadman anchors: tie a stick or rock to the guyline, bury it a few inches deep, and cover it with dirt. This works surprisingly well.
Rain and Condensation Management
A dry tent is a happy tent. The rain fly should never touch the inner tent — that's how water seeps through. If the fly is sagging, tighten the guylines. If it's still touching, you may need to pitch the fly higher by extending the pole ends or using a trekking pole to prop up the center.
Condensation is unavoidable, but you can minimize it. Set up in a spot with some airflow — not a hollow where cold air settles. Leave the fly's vents open, even in light rain. In the morning, wipe condensation off the inner walls with a camp towel before packing. Never pack a wet tent; it will mildew and smell.
Interior Layout: Three Zones for Sanity
Once the tent is up, organize the inside before you bring in gear. I divide the floor into three zones:
- Sleep zone — the far end. Sleeping pads and bags go here. I place pads directly on the tent floor, not on top of a sleeping bag, to maximize insulation.
- Dry zone — the middle. This is where I change clothes, store my pack, and keep items I need during the night (headlamp, water bottle, glasses). A small gear loft or mesh pocket on the tent wall keeps things off the floor.
- Entry zone — near the door. Boots, muddy gear, and the camp stove (only used outside, never inside the tent) stay here. I put a small tarp or doormat just outside the door to scrape dirt off before entering.
Never store food, toothpaste, or any scented item inside the tent. The smell attracts raccoons, mice, and bears. Use a bear canister or hang a bear bag at least 100 feet away from your sleeping area. This is non-negotiable for safety.
Quick Takeaway
The best campsite setup starts before you pitch the tent. Walk the site, feel the wind, clear the ground. Stake corners first, then tension the fly with guylines. Keep the fly off the inner tent. Organize your interior into zones. And always store food away from where you sleep. These methods don't take extra time — they just take deliberate attention. Your tent will be stable, dry, and comfortable, no matter what the weather does.
Frequently Asked Questions
What is the first thing I should do when I arrive at a campsite?
Walk the entire site before unpacking. Look for level ground, natural windbreaks like trees or boulders, and clear the area of sharp rocks, sticks, and pine cones. Check for low-hanging branches that could scrape your tent or collect water. This five-minute walk saves you from repitching later.
Should I use a footprint or ground tarp under my tent?
Yes, but size matters. The tarp should be slightly smaller than your tent floor. If it sticks out, rain will pool between the tarp and the tent, soaking your floor. Tuck the edges under or trim it. For extra protection, use a purpose-made footprint that matches your tent model.
How do I keep my tent from blowing away in wind?
Orient the narrow end of your tent into the wind — not the broad side. Stake all corners first, then use every guylines point on the rain fly. Add extra stakes on the windward side, and tie a taut-line hitch on guylines so you can adjust tension without retying. In extreme wind, set up behind a natural barrier.
What is the best way to organize gear inside a tent?
Create three zones: sleep (far end), storage (near the door), and a dry changing area (middle). Keep everything in stuff sacks or mesh bags so you can find things in the dark. Never store food or scented items inside the tent — use a bear canister or bear bag 100 feet away. Hang a small gear loft or use a string line for headlamps and glasses.