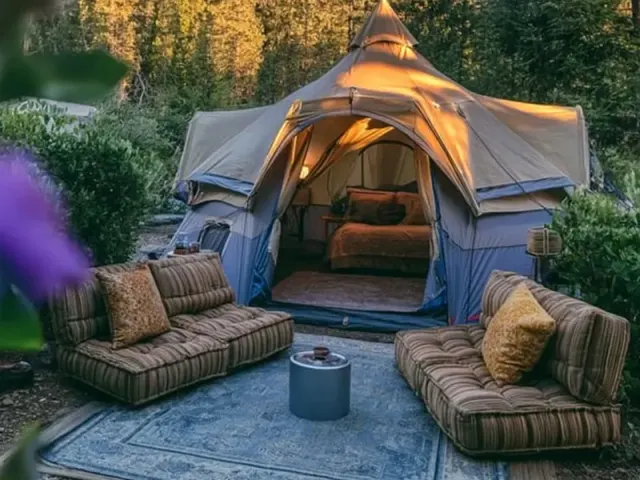
Tent Camping Setup Ideas: 5 Pro Tips for a Better Pitch
There's a specific sound a tent makes when it's pitched right. Not the flapping of a loose fly, but a low, steady hum—the fabric pulled taut, the guylines singing just a little in the breeze. That sound tells me the tent will stay dry through a midnight shower and won't collapse when the wind picks up at 3 a.m. Getting there takes more than shoving poles through sleeves. It takes a deliberate sequence, a few small tricks, and knowing exactly where to put tension.

Here are my five tent camping setup ideas that go beyond the obvious. Each one solves a real problem—wind, rain, condensation, or the sheer frustration of a saggy pitch.
1. Stake in a Cross Pattern, Not a Circle
Most people stake the corners in order around the tent—front left, front right, back left, back right. That lets the tent shift with each stake, and you end up with a crooked floor. Instead, stake opposite corners first. Drive a stake at the front-left corner, then go straight across to the back-right. Pull the floor tight, stake it. Then do front-right and back-left. This cross pattern locks the floor in place, keeping it square and wrinkle-free. Wrinkles in the floor create low spots where water can pool under your sleeping pad.
Stake at a 45-degree angle, leaning away from the tent. That gives the stake more holding power than a vertical drive. In sandy or loose soil, bury the stake nearly horizontal, with just the hook above ground, and cover it with a rock or log.
2. The Fly Should Be a Drum, Not a Blanket
A rain fly that touches the tent body anywhere is a rain fly that will leak. Water wicks through fabric when two layers are pressed together. The fix is simple: after you clip the fly to the pole ends, walk around the tent and pull each corner of the fly outward until the fabric is smooth and taut. It should look like a drum skin, not a blanket draped over a chair. Then stake the fly corners. If your fly has adjustable buckles or tensioners at the corners, use them to fine-tune the tightness after staking.
Here's the trick most people miss: the fly should be slightly higher off the ground on the windward side. That lets air flow under it, reducing lift. On the leeward side, you can stake the fly closer to the ground for more rain protection. Adjust the corner tensioners to create this asymmetry.
3. Guyline Geometry Matters More Than You Think
Guylines aren't optional accessories. They're structural. The key is the angle of the line relative to the ground. A guyline that runs straight out from the tent at 90 degrees to the side wall does almost nothing. The wind hits the tent side, the line goes slack, and the tent wall collapses inward. Instead, run each guyline at a 45-degree angle forward or backward from the side of the tent. That way, the line catches the wind from the side and redirects the force along the line's length, keeping the wall stable.
Use a taut-line hitch on each guyline. It's a simple sliding knot that lets you adjust tension without retying. I tie it about halfway down the line, leaving enough tail to grab. When the wind picks up, I just pull the tag end to tighten without leaving the tent.
4. Create a Dry Entry Zone
Wet gear inside the tent is the fastest way to a damp sleeping bag and a miserable night. The solution is a dedicated dry entry zone in the vestibule. Before you pitch, decide which side of the tent will face the prevailing wind. That side becomes your dry entry. Place your camp chair or a small dry bag just inside the vestibule door. When you come in from the rain, sit down, take off your wet rain jacket and pants, and stuff them into the dry bag or hang them from a loop inside the vestibule. Never bring wet clothing past the vestibule zipper.
If your tent has two vestibules, use one for wet gear storage and the other for entry. That keeps the sleeping area dry and organized.
5. Ventilate Before You Sleep
Condensation is the enemy of a comfortable night. Even on a dry night, your breath adds moisture to the air inside the tent. The fix is cross-ventilation. Before you crawl into your bag, open the top vent on the rain fly (if your tent has one) and unzip the door's mesh panel about an inch from the bottom. This creates a chimney effect: warm, moist air rises out the top vent, and cool, dry air enters near the ground. On a cold night, you'll feel a slight draft, but your sleeping bag will stay dry. A damp bag loses insulation value fast.
If your tent doesn't have a top vent, pitch the rain fly slightly off-center—leave one side of the fly a few inches higher than the other. This creates a gap for air to flow across the top of the tent without letting rain in.
Takeaway: A great tent pitch isn't about brute force or expensive gear. It's about sequence, angle, and a few deliberate adjustments. Stake opposite corners first. Pull the fly drum-tight. Run guylines at 45 degrees. Keep wet gear in the vestibule. Ventilate before you sleep. Do these five things, and your tent will feel like a shelter, not a chore.
Frequently Asked Questions
What is the best order to set up a tent?
Start with the footprint (if you use one), then lay out the tent body and attach the poles. Insert poles through sleeves or clips, raise the frame, and stake the four corners in a cross pattern (opposite corners first). Next, attach the rain fly, centering it so the doors align. Stake the fly corners, then tension all guylines. Finally, adjust the fly height and vestibule poles. This sequence prevents the tent from shifting and keeps the fly from sagging.
How do I keep my tent from leaking in heavy rain?
Two things matter most: a taut rain fly and good ventilation. A loose fly lets water pool and seep through seams. Pull the fly drum-tight and stake the guylines at 45-degree angles away from the tent. Also, open the top vents and leave the door mesh unzipped an inch—this stops condensation from forming on the inside of the fly, which can drip on you and feel like a leak.
Should I use a footprint under my tent?
Yes, but only if it's cut slightly smaller than the tent floor. A footprint that extends beyond the floor acts like a rain gutter, channeling water underneath. I use a piece of Tyvek or a custom-cut ground cloth that sits about an inch inside the perimeter. It protects the floor from sharp rocks and roots without creating a water trap.