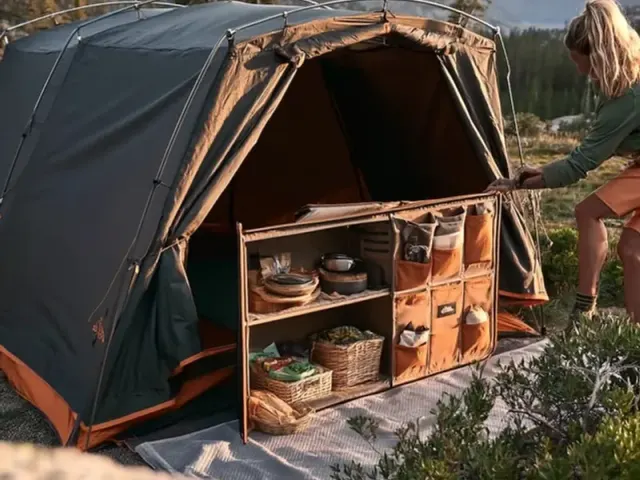
Tent Camping Food Organization: 5 Systems That Actually Work
The first time I unpacked my camp kitchen, I found a smashed loaf of bread under a leaking bottle of olive oil. The salt shaker had exploded inside the dry bag. And the cheese? Let's just say it melted into something unrecognizable. That's when I learned that tent camping food organization isn't about fancy gadgets—it's about systems that survive the drive, the weather, and the hungry critters.

Here are five practical methods I use to keep food organized, safe, and easy to access, whether I'm out for a weekend or a full week.
1. The Three-Bin Dry Food System
Forget throwing everything into one duffel. I use three clear, stackable plastic bins with tight-sealing lids. Each bin is roughly 12 by 15 by 8 inches—big enough for a family of four per meal category.
- Bin 1: Breakfast & Snacks — granola, oatmeal packets, protein bars, trail mix, instant coffee, tea bags.
- Bin 2: Lunch & No-Cook — tortillas, peanut butter, canned tuna, crackers, dried fruit.
- Bin 3: Dinner & Cooking Staples — pasta, rice, seasoning packets, oil (in a leak-proof bottle), and any pre-cooked meals.
Label each bin on the lid and one side with a permanent marker. Stack them in the car with the heaviest bin on the bottom. This system makes it easy to grab what you need without rummaging. Plus, the clear plastic lets you see inside at a glance.
Common mistake: Using cardboard boxes. They collapse when damp. Stick with hard plastic.
2. The Cooler Within a Cooler
A single cooler for everything is a recipe for warm drinks and soggy vegetables. Instead, I use two coolers: one for drinks and one for perishable food. The drink cooler gets opened constantly—that's fine, because it doesn't hold raw meat or dairy. The food cooler stays closed as much as possible.
How to pack the food cooler
- Freeze water bottles or use block ice. Block ice lasts 2–3 days longer than cubes.
- Pre-chill the cooler at home for 24 hours before loading.
- Pack raw meat in a leak-proof container on the bottom, so juices can't drip onto produce.
- Layer: ice, then a towel, then food, then more ice on top. Cold air sinks, so top ice keeps everything cold.
Safety note: Keep raw meat separate from ready-to-eat foods. Use a dedicated insulated bag for raw meat if you're short on space. And never store the cooler inside your tent—it attracts animals.
3. The Spice & Condiment Kit
Spices and condiments are the most disorganized items in any camp kitchen. I use a small, soft-sided lunch box or a 6-by-8-inch waterproof pouch. Inside, I pack:
- Mini squeeze bottles for oil, vinegar, and soy sauce (buy them at a dollar store).
- Small zip-top bags for salt, pepper, chili flakes, and garlic powder.
- Single-serving packets of ketchup, mustard, and mayo (grab extras from fast-food runs).
Keep this pouch inside your dinner bin or in an outside pocket of your pack. It takes 30 seconds to grab and keeps everything from rolling around the cooler or spilling in the dry bins.
4. The Bear-Proof Nighttime Routine
No matter where you camp, assume there's a raccoon, squirrel, or bear that wants your food. Every night, I do a 10-minute sweep:
- All food, trash, and scented items (toothpaste, sunscreen, lip balm) go into a bear-proof canister or a rodent-proof bag.
- The canister goes at least 100 feet from the tent and cooking area, downwind if possible.
- I hang the canister only if required by local regulations—otherwise, I leave it on the ground, wedged between rocks or under a log. Hanging is tricky and often done wrong.
Pro tip: Store your cooking utensils and stove with the food canister, not in the tent. Even a greasy spatula can attract a curious animal.
5. The Meal-by-Meal Prep Pouch
This is the trick that saves the most time at camp. Before I leave, I prep each meal into its own pouch. For example, for spaghetti night: a zip-top bag with pasta, a small container of sauce, and a separate bag with seasonings. For breakfast: a bag with pre-portioned oatmeal, dried fruit, and a packet of instant coffee.
Label each pouch with a permanent marker. When it's time to cook, grab the pouch and go. No measuring, no hunting for ingredients. This also makes it easy to see if you're running low on a specific meal.
Adapt for kids: Let each child pack their own snack pouch. It gives them ownership and keeps them from asking "what's for snack?" every 20 minutes.
Takeaway
Tent camping food organization comes down to three things: separation (dry vs. cold, food vs. scents), preparation (pre-portion and pre-pack), and routine (the nightly sweep). Nail these, and you'll spend less time digging through a mess and more time enjoying the meal—and the view.
Frequently Asked Questions
How do I keep food cold while tent camping?
Use a high-quality cooler with a pre-chilled interior. Freeze water bottles or use block ice—they last longer than cubes. Keep the cooler in the shade, cover it with a reflective blanket, and only open it when necessary. A separate cooler for drinks reduces temperature swings on your food.
What is the best way to organize dry food for camping?
Use clear, stackable plastic bins with tight lids. Group by meal or category (breakfast, snacks, dinner). Label each bin with a permanent marker or tape. Pack a separate small bin for spices, oil, and condiments to avoid spills.
How do I keep animals away from my camp food?
Store all food, trash, and scented items (toothpaste, sunscreen) in a bear-proof canister or a rodent-proof bag. Keep the container at least 100 feet from your tent and cooking area. Never bring food inside your tent—even crumbs can attract wildlife.
Should I pre-cook meals before tent camping?
Yes, pre-cooking saves time and reduces cleanup. Cook chili, stews, or pasta sauces at home, then freeze them in zip-top bags. They double as ice packs in your cooler. Reheat in a pot or over the fire.