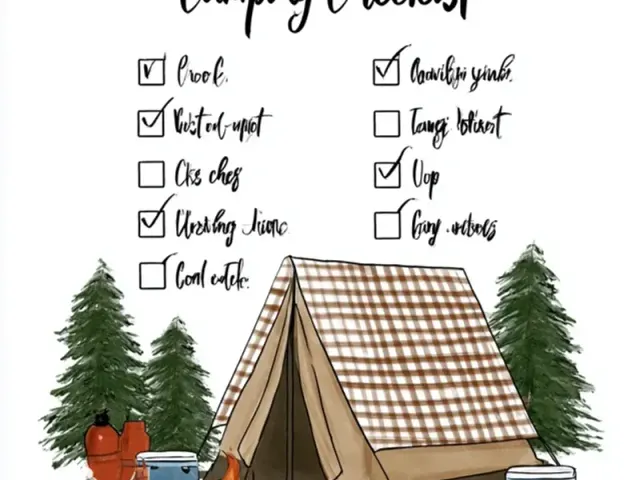
Tent Camping Checklist Free Printable – Pack Smarter
The best tent camping trips start before you ever leave the driveway. I’ve learned this the hard way—standing in a drizzle, realizing the rainfly is still folded on the garage floor. That’s why I use a tent camping checklist free printable. But here’s the trick: I don’t just pack from it. I do one extra step that most checklists miss: a pre-trip test pitch.

Unpack the tent in your living room or backyard. Pitch it fully—poles, fly, stakes, footprint. Check every seam, zipper, and clip. Only then do you pack it back into its sack, checking each item off your list as it goes in. This single habit has saved me from broken poles, missing stakes, and a torn mesh panel that would have meant a buggy night. Now, let’s build a checklist that actually works.
The Core Shelter System
Start with the tent itself. Your checklist should include: tent body, poles (count them—usually three to four for a dome), rainfly, footprint or ground tarp, stakes (at least eight, plus four extras for guylines), and a pole repair sleeve or splint. The common mistake is assuming the tent bag has everything. After a season, poles can shift, stakes get borrowed, and the footprint gets left behind. Lay it all out, count it, then pack it.
For windy sites, add four 12-inch aluminum stakes and two 6-foot reflective guylines. Stake the tent at a 45-degree angle away from the tent wall, not straight down. This resists pull-out force. On hard-packed ground, use a rock to tap stakes in gently—never hammer at full force, or you’ll bend them.
Sleeping Comfort
A warm, dry sleep system is non-negotiable. List: sleeping bag (check the temperature rating—add 10°F for comfort), sleeping pad (inflatable or foam), pillow (stuff sack with clothes works), and a ground cloth inside the tent for extra moisture protection. If you use an inflatable pad, pack a small repair kit—a patch and a few adhesive squares. One pinprick can deflate your night.
For cold-weather camping, add a closed-cell foam pad under your inflatable pad. That double layer traps more heat. For hot nights, unzip the sleeping bag and use it as a quilt. Always store your sleeping bag loose in a large cotton sack, not compressed, to preserve loft.
Kitchen and Food Storage
Camp cooking gear: camp stove (test it before the trip), fuel canister (full), lighter or matches in a waterproof container, pot with lid, spork or utensil set, mug, bowl, and a small cutting board. Bear-resistant food container or bear bag with a 50-foot rope, and a cooler if car camping. The trick here: pack a small Ziploc with dish soap, a scrub sponge, and a microfiber towel. Clean up immediately after eating—don’t let food residue sit in your tent or near your sleeping area. Store all food, trash, and scented items (toothpaste, sunscreen) in the bear container or hung at least 100 feet from your tent, 10 feet off the ground, and 4 feet from the tree trunk.
Lighting and Navigation
Headlamp (with fresh batteries), lantern (LED, not fuel—inside a tent), and a spare set of batteries. A compass and a paper map of the area—even if you use your phone, paper doesn’t lose signal. Pack a small whistle and a signal mirror. For night navigation, use a red light mode on your headlamp—it preserves night vision and doesn’t draw bugs.
Safety and Repairs
First-aid kit (include blister pads, antiseptic, tweezers, and pain reliever), multi-tool or knife, fire starter (ferro rod or waterproof matches), and a small sewing kit for gear repairs. Add a length of paracord—20 feet—for clothesline, tying gear, or emergency lashing. One more item: a small trowel for digging cat holes if there are no toilets. Always check local regulations for fire restrictions and food storage rules.
Weather Adaptations
Rain: Pack a lightweight rain jacket and pants, a tarp for a cooking shelter (10x10 feet), and a dry bag for electronics and clothes. Set up your tent on high ground, not in a depression. Dig a shallow trench around the tent only if allowed—otherwise, let the rainfly do its job.
Wind: Use all stake loops, not just the corners. Add guylines to the rainfly. Orient the tent door away from the wind. Lower the tent profile by loosening the poles slightly—a taut but not rigid fly sheds wind better.
Heat: Choose a tent with mesh panels and a full rainfly that can be stowed. Pitch in shade by late afternoon. Use a reflective emergency blanket under the rainfly to deflect heat.
Kids: Give each child their own mini checklist with pictures. Let them pack their own flashlight and water bottle. Use a colored sticker system—green for packed, red for missing—on a shared family checklist.
Download and Use Your Checklist
Print your tent camping checklist free printable on cardstock and laminate it, or slip it into a plastic sleeve. Use a dry-erase marker to check items off. After each trip, review what you used and what stayed in the bag. Adjust the list accordingly—leave the extra frying pan at home, add the repair tape you wished you had. The goal isn’t to pack everything, but to pack exactly what you need.
Takeaway: A checklist is only as good as your pre-trip test. Pitch the tent, pack with intention, and adapt for weather and terrain. The forest floor will feel a lot softer when you’re not lying awake wondering if you forgot the stove fuel.
Frequently Asked Questions
What is the most commonly forgotten item on a tent camping checklist?
The tent footprint or ground tarp. Many campers remember the tent body and poles but skip the footprint, which protects the tent floor from moisture and abrasion. Add it to your checklist and cut it to fit just inside the tent dimensions.
How do I use a tent camping checklist with kids?
Print two copies: one for you, one for the kids. Let them check off their own items like sleeping bags, pillows, and flashlights. Use a laminated checklist and a dry-erase marker so they can reuse it. This builds responsibility and cuts down on last-minute scrambling.
Should I include a rainfly on my checklist even if the forecast is clear?
Yes, always. Weather changes fast in the backcountry. A clear morning can turn into an afternoon thunderstorm. Pack the rainfly and practice attaching it at home so you can deploy it quickly without fumbling.
What is the one tool that should be on every tent camping checklist but often isn't?
A small seam sealer or repair tape. Tent seams can leak after a season of use, and a small tear can become a big problem. A 1-ounce tube of seam sealer and a 3-inch strip of repair tape weigh almost nothing and can save a trip.
How do I keep my tent camping checklist from getting lost?
Attach it to a mini carabiner and clip it to your gear bag handle. You can also take a photo of the checklist on your phone as a backup. For a free printable, store it in a clear plastic sleeve with a binder clip.