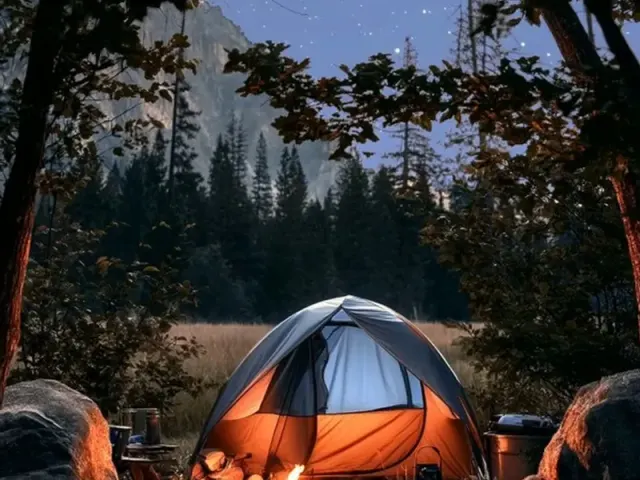
Tent Camping Aesthetic Drawing: Sketch Your Cozy Campsite
The first time I tried to draw my campsite, the tent came out looking like a lopsided potato with a zipper. It was frustrating, but it taught me something important: a tent camping aesthetic drawing isn't about perfection. It's about capturing the feeling of being there — the soft glow of a lantern through nylon, the way pine branches frame the sky, the quiet weight of a sleeping bag in the corner. You don't need to be a trained artist. You just need a few solid techniques and a willingness to slow down.

Start with a Strong Foundation: Tent Perspective
The most common mistake in tent camping aesthetic drawing is skipping the structure. A tent has angles, and if you guess them, it will look flat or warped. Here's the method I use every time. Place your sketchbook so the horizon line runs across the middle of the page. Mark two vanishing points — one far left, one far right. They don't need to be on the paper; just imagine them. Draw a vertical line in the center for the tent's peak. Then, from the top of that line, draw two lines down to each vanishing point. That gives you the roof slope. For the base, draw a horizontal line at the bottom of the tent, and connect its ends to the vanishing points. Now you have a three-dimensional shape. It sounds technical, but once you do it twice, it becomes muscle memory.
Adapting for a Dome Tent
If you're drawing a dome tent, the perspective changes slightly. Instead of a sharp peak, sketch a gentle curve from the center pole outward. Use a light hand — you can darken the final line later. The key is to keep the curve symmetrical. I often draw a faint vertical guideline down the middle and check both sides before committing to the line. For a family-sized tent, add a second curve for the rainfly, slightly larger and higher, to show the protective outer layer.
Create Atmosphere with Light and Shadow
This is where your drawing goes from a diagram to an aesthetic piece. The tent itself is just the anchor. The magic happens in the light. If you're drawing a night scene, imagine the lantern inside the tent as the only light source. Use a soft pencil (2B or 4B) to shade the tent fabric, leaving the area near the lantern lighter. The edges of the tent should fade into darkness. For a daytime scene, the sun is your source. Shade the side of the tent opposite the sun, and keep the lit side almost white. A common beginner mistake is shading too evenly. Instead, let the shadows be darker near the ground and under the rainfly. That contrast creates depth.
Adding a Warm Glow
If you work with watercolor or colored pencil, a thin wash of yellow-orange inside the tent makes it feel alive. Keep the paint transparent — you want to see the pencil lines through it. For a campfire glow outside the tent, use a similar warm wash but blend it outward into the cool blue of the night. This temperature contrast — warm inside, cool outside — is what makes a tent camping aesthetic drawing feel cozy.
Frame the Scene with Natural Elements
A tent floating on white paper feels lonely. Ground it with trees, ground, and sky. For pine trees, the trick is to layer triangles. Start with a tall triangle for the overall shape, then add horizontal zigzag lines for the branches. Each layer should be slightly wider than the one above. Leave small gaps between branches to suggest needles. For deciduous trees, use a series of overlapping circles or cloud-like shapes. Keep the trees in the background lighter and less detailed — that creates atmospheric perspective. Add a few pine needles or small rocks in the foreground to anchor the tent to the ground. A simple horizontal line with a bit of texture (short vertical strokes) works for grass.
Weather Considerations
If you're drawing a rainy campsite, add puddles reflecting the tent's glow. Use horizontal lines for rain, but keep them subtle — too many will clutter the drawing. For a windy scene, angle the trees slightly to one side and add a few flying leaves. For snow, leave the ground white and add soft blue shadows under the tent. Each weather condition changes the feel of the drawing, and capturing that is what makes your work unique.
Small Details That Tell a Story
The difference between a generic tent drawing and an aesthetic one is the details. A pair of boots by the door. A mug of coffee on a log. A string of fairy lights draped over the tent pole. These small elements invite the viewer into your scene. But don't overdo it. Pick two or three details and place them intentionally. I like to add a small campfire in the foreground, with logs drawn as overlapping cylinders and flames as teardrop shapes. The smoke can be a few wispy lines that fade as they rise. Keep the fire small — safety first, even in a drawing.
Safety Note for Real Camping
While you're sketching, remember that the real tent needs to be secure. If you're drawing at your campsite, make sure all stakes are fully driven in and guylines are taut, especially if wind picks up. Never leave a lantern or candle unattended near tent fabric. And keep your sketchbook and pencils in a dry bag if there's any chance of rain. A wet notebook is a sad notebook.
Putting It All Together
Start with perspective. Add light and shadow. Frame with nature. Sprinkle in a few meaningful details. That's the entire method for a tent camping aesthetic drawing. It's not about copying a photograph — it's about recording the feeling of a place. The scratch of a pencil on paper, the smell of pine, the distant crackle of a fire. Your drawing will never be exactly like anyone else's, and that's the point. So grab a sketchbook next time you camp, find a quiet spot, and draw what you see. You might surprise yourself.
Frequently Asked Questions
What supplies do I need for tent camping aesthetic drawing?
A sketchbook with smooth paper, a mechanical pencil (0.5mm) for fine lines, a soft eraser, and a fine-liner pen (0.3mm or 0.5mm). Optional: a small watercolor set for adding warmth.
How do I draw a tent that looks realistic?
Start with a simple two-point perspective: draw a horizontal line for the horizon, place two vanishing points far apart, and sketch the tent's main rectangle between them. Add a peak by drawing a line from the center up to a point above the rectangle, then connect to the vanishing points. This gives the tent depth.
What makes a camping drawing feel aesthetic?
Focus on light and texture. Add a warm glow from inside the tent using soft pencil shading or a wash of yellow watercolor. Use cross-hatching for the canvas fabric to suggest its weight. Include small details like a campfire glow, a mug of coffee, or pine needles on the ground.
How do I sketch trees around my tent?
Use a simple triangle or cone shape for pine trees, then add layered zigzag lines for branches. Keep the trees lighter in the background and darker in the foreground to create depth. Leave a few gaps to suggest moonlight filtering through.
Can I draw a tent camping aesthetic scene with kids?
Absolutely. Keep it simple: draw a triangle for the tent, a rectangle for the door, and a circle for the lantern. Let kids add their own details like stars, a crescent moon, or a tiny campfire. Use crayons or colored pencils for a playful feel.