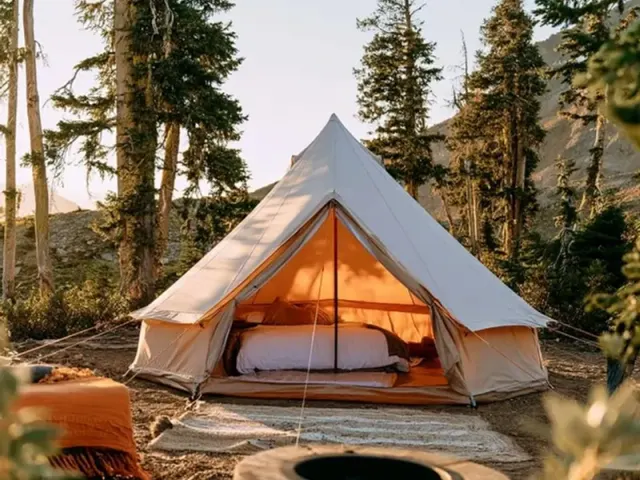
DIY Tent Living Full Time: A Practical Setup Guide
The first morning I woke up in a tent that was truly home, I noticed something I’d missed on weekend trips: the sound of the rain on the fly was different. It wasn’t the frantic drumming of a passing storm. It was a steady, almost musical patter that meant I had time. Time to stretch, to make coffee, to plan the day. Living in a tent full time changes your relationship with the weather. It also demands a different level of setup. You can’t just stake it down and hope. Here’s how I approach a DIY full-time tent setup that’s safe, comfortable, and resilient.

Site Selection: The Foundation You Can’t Skip
Before you pitch a single pole, spend an hour walking the site. Look for natural drainage—a slight slope so water runs away, not under. Avoid depressions that turn into puddles after rain. Clear the ground of rocks, roots, and pine cones. I use a small rake and spend fifteen minutes leveling the pad. Then I lay down a ground cloth that’s exactly the footprint of the tent floor, not larger. A larger cloth catches rainwater and channels it under the tent. That’s the mistake most people make. Keep it flush.
Pitching for the Long Haul
I start with the corners, staking each one at a 45-degree angle away from the tent. Then I stake the vestibules and all guy-out points. For full-time living, I replace the flimsy stakes that come with most tents with 8-inch aluminium Y-stakes. They hold in soft ground and won’t bend on rocky soil. Every guy line gets a taut-line hitch—not a simple knot. That hitch lets me adjust tension as the fabric stretches or the wind shifts. I tension the lines so the fly is drum-tight. No flapping. Flapping wears out fabric and keeps you awake.
Managing Moisture: The Real Enemy
Condensation is the biggest challenge in a tent you live in. Your breath, your cooking, even your skin releases moisture. A single person can add a pint of water to the air overnight. I mitigate this with two strategies. First, I pitch the tent with the doors facing the prevailing breeze. Second, I use a small battery-powered fan clipped to the ridge line to keep air moving. In cold weather, I crack the top vent and one side door an inch. You want crossflow, not a sealed envelope. If you wake to damp walls, wipe them down with a microfiber cloth before they drip on your gear. That cloth lives in a mesh pocket by the door.
Rain Management
When rain is forecast, I dig a shallow trench around the tent—not against the walls, but about six inches out. This channels water away from the footprint. I also add a second tarp over the rainfly, suspended on a separate ridgeline about a foot above the tent. That air gap stops water from wicking through and cuts the sound of heavy rain. Secure the tarp with taut lines so it doesn’t become a sail in wind.
Organizing Your Living Space
In a weekend tent, you can live out of a duffel. In a home tent, you need zones. I designate three areas: sleep, storage, and living. The sleep zone is a closed-cell foam pad under an inflatable pad for insulation and comfort. The storage zone uses stackable clear bins—keeps gear dry and visible. The living zone has a camp chair and a small folding table. I use mesh hanging pockets on the tent walls for toiletries, headlamp, and phone. Everything has a place. When you live in a tent, clutter becomes chaos fast.
Cooking and Heat Safety
Never cook inside the tent. Carbon monoxide is odorless and deadly. I set up a small vestibule with a camp stove under a tarp, well away from the tent walls. For heat, I use a certified tent-safe propane heater with a low-oxygen shutoff, and I always crack a vent. I also keep a battery-powered carbon monoxide detector inside the tent. It’s a small investment that buys peace of mind. Check local fire regulations before using any flame.
Adapting for Wind and Cold
In high wind, I lower the tent profile by not using the rainfly’s pole vents. I add extra guylines to the windward side, staking them at a wider angle. For cold weather, I lay a reflective blanket (like a space blanket) under the sleeping pad to bounce body heat back. I also put a wool blanket over the sleeping bag for additional insulation. The key is to trap air, not compress it. Don’t overstuff the tent with gear—air needs to circulate.
Wildlife-Safe Food Storage
This is non-negotiable. Store all food, trash, and scented items in a bear-proof canister or scent-proof bag at least 100 feet from the tent. Hang it from a tree branch (if local regulations allow) or use a provided bear box. Never bring food into the tent, not even a granola bar wrapper. A single scent trail can bring curious animals right to your door. Check with the land manager for specific rules.
Takeaway: Home Is Where You Pitch It
Living in a tent full time isn’t just about surviving the elements. It’s about creating a space that works for you day after day. Start with the ground, secure every line, manage moisture, and keep your gear organized. The sound of rain on the fly will become a familiar comfort, not a worry. And when you wake to that steady patter, you’ll know you set it up right.
Frequently Asked Questions
How do I keep my tent cool in summer when living in it full time?
Set up in a shaded area with good airflow. Use a reflective tarp over the rainfly to deflect heat, and keep the tent doors and vents open during the day. A battery-powered fan hung from the ridge line can make a big difference.
What's the best way to prevent condensation inside a tent for long-term stays?
Choose a double-wall tent with good ventilation. Open all vents and doors partially during the day. Avoid cooking or drying wet clothes inside the tent. If condensation forms, wipe it down with a microfiber cloth each morning to prevent mold.
How do I store food safely when living in a tent full time?
Never store food inside the tent—it attracts wildlife. Use a bear-proof canister or a scent-proof bag stored at least 100 feet from your tent, hung from a tree branch (if regulations allow). Check local wildlife guidelines for specific requirements.