
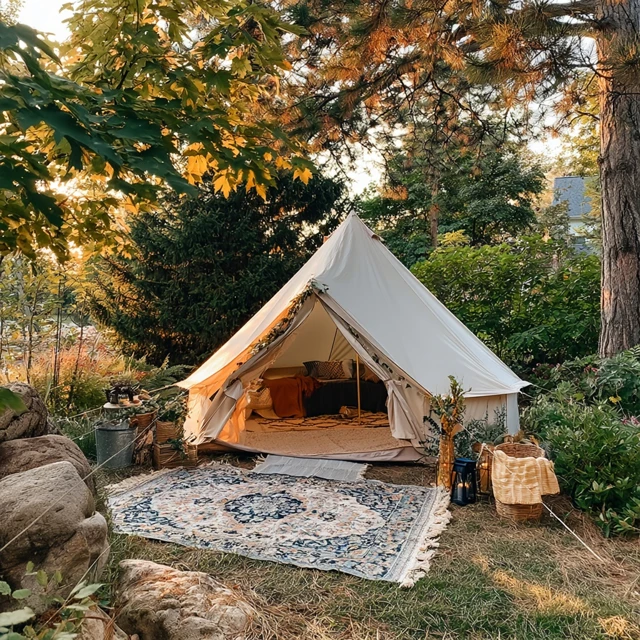
There’s a distinct sound to rain on a tent fly when you’re lying on a cushioned floor, warm under a quilt, with a string light glowing above your head. It’s not roughing it — it’s upgrading the experience without losing the connection to the outdoors. That’s the heart of DIY glamping: small, intentional changes that make your tent feel like a cozy room under the stars. Here are five practical upgrades that add real comfort to your tent setup, using gear you can find or make yourself.

1. Build a Tent Floor That Feels Like Home
The ground is the biggest comfort killer. Even a good sleeping pad leaves cold spots and that hard feeling under your hips. Instead, create a layered floor system. Start with a heavy-duty tarp under your tent to block moisture. Inside, use interlocking foam mats (the kind used for kids’ playrooms or gyms) to cover the entire floor. One 24-inch square mat per square foot works well; a 6-person tent needs about 24 mats. Over that, lay a washable outdoor rug — the flat-weave kind that won’t trap dirt. The mats insulate from cold ground, soften every step, and make kneeling to pack feel less punishing. Common mistake: skipping the tarp under the tent. Even with a waterproof floor, ground moisture wicks through. Always use a footprint or tarp that extends just to the tent edges — not beyond, or rain will pool under your floor.
2. Soft Lighting That Sets the Mood
Harsh headlamp glare kills the cozy vibe. Replace it with layered, warm light. Use battery-operated string lights with a low lumen output — around 5 to 10 lumens per bulb is plenty. Drape them along the tent ridge pole or across the ceiling using small adhesive hooks. For task light, a dimmable LED lantern set to a warm color temperature (around 2700K) works well. Place it on a low table or hang it from a loop. The trick: avoid placing lights directly above your face — aim them toward the tent walls to diffuse the glow. This softens shadows and makes the space feel larger. Safety note: never use candles or fuel-based lanterns inside a tent. Even LED candles with flickering effects are fine, but keep them away from flammable fabric.
3. Cozy Bedding Without the Bulk
You don’t need a heavy sleeping bag to stay warm. Instead, use a layered bedding system. Start with an insulated sleeping pad (R-value of 4 or higher for cold nights). On top, place a cotton or flannel fitted sheet — yes, you can find twin-size sheets that fit a sleeping pad. Then add a lightweight down or synthetic quilt, and a fleece blanket on top. This combo traps heat better than a single bag, and you can adjust layers as temperatures change. For a real homey touch, bring a small pillow from home in a colorful case. Common mistake: using a sleeping bag rated for extreme cold when the forecast is mild. You’ll overheat and wake up sweaty. Instead, bring a 40°F quilt and a fleece liner — you can always add layers.
4. A Practical Camp Kitchen That Works in Wind
Glamping doesn’t mean gourmet cooking on a campfire. But a stable, organized cooking area makes meals feel less like a chore. Use a folding camp table with a wind screen — you can make one from a rolled aluminum baking sheet. Set up your stove on the table, not on the ground. This saves your back and keeps the flame away from dry grass. Store utensils in a fabric roll-up organizer, and keep spices in small labeled containers in a plastic bin. The one trick that changes everything: pre-chop vegetables and pre-measure dry ingredients at home, storing them in reusable bags or containers. At camp, you just dump and cook. For cleanup, bring a collapsible sink and biodegradable soap. Never wash dishes in a stream or lake — even biodegradable soap can harm aquatic life. Pack out all food scraps.
5. Create Zones Inside Your Tent
A tent is small, but dividing it into zones makes it feel bigger. Use fabric storage cubes or collapsible bins to create a “gear corner” for shoes, backpacks, and extra layers. Keep a designated “sleeping zone” clear of clutter — only bedding and pillows. A small side table or hanging organizer holds your book, phone, glasses, and water bottle within reach. The trick: use a mesh laundry bag hung from a tent loop to store dirty clothes. It keeps odors separate and doesn’t take up floor space. For kids, create a “quiet zone” with a soft mat and a few toys — it gives them a defined space and keeps the tent organized.
Takeaway: DIY glamping is about small, smart changes that improve your comfort without complicating your setup. Start with one upgrade — a cushioned floor or better lighting — and build from there. The goal isn’t to bring the whole house; it’s to make your tent a place you actually want to spend time in, rain or shine.
Frequently Asked Questions
What is the easiest DIY glamping upgrade for a tent?
Adding a foam mat floor topped with an outdoor rug is the quickest way to transform comfort. It insulates from cold ground, cushions your sleep, and makes the space feel like a room. Interlocking foam mats (like those used for gyms) work perfectly.
How can I make my tent feel cozy without heavy gear?
Focus on lighting and soft layers. Use battery-operated string lights or a dimmable lantern for warm light. Add a fleece blanket, a small pillow, and a fabric storage cube for a homey touch. Avoid open flames inside the tent.
Is it safe to use a heater inside a glamping tent?
Only use heaters specifically rated for tent use, and always follow the manufacturer’s safety guidelines. Never use propane or charcoal heaters inside a tent due to carbon monoxide risk. A hot water bottle or insulated sleeping pad is a safer warmth option.
What are some low-cost glamping decor ideas?
Use items you already have: a cotton duvet cover instead of a sleeping bag, a cloth tablecloth on a folding table, and a small vase with wildflowers. Thrift store lanterns and fabric bins keep things organized and stylish.
How do I keep my tent floor clean while glamping?
Lay a tarp under your tent footprint, then use a doormat just inside the tent door. Keep a small broom or hand vac handy for sweeping dirt. Designate a shoe zone — a plastic bin or mat — to keep mud outside the sleeping area.